
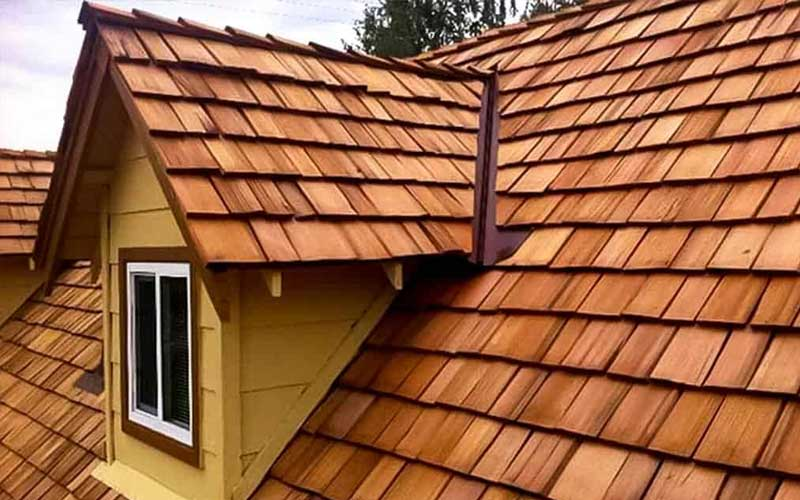
Why a Roof Inspection Is One of the Smartest Calls a Homeowner Can Make
The roof above your head does an extraordinary amount of works every single day. It shields everything inside from rain, wind, heat, and debris without ever asking for much in return. That silence, however, can be misleading. A roof that looks perfectly fine from the ground can be concealing issues that are quietly growing more serious and more expensive with every passing season.
See What Your Roof Is Really Telling You
Most roof problems are invisible until they become unavoidable, and by that point the repair costs have already climbed. Homeowners who schedule a professional Austin roof inspection get ahead of those problems before minor vulnerabilities turn into major structural headaches that disrupt the entire household.
Visual Checks from the Ground Are Never Enough
To begin with, what a homeowner can observe from a driveway or backyard gives an incomplete and often misleading picture of actual roof condition. Damaged flashing, deteriorating underlayment, compromised pipe boots, and early-stage shingle granule loss are all conditions that require close physical inspection to identify accurately. A trained roofing professional climbs onto the surface, examines every component systematically, and spots developing problems that would remain invisible to an untrained eye until water intrusion makes them impossible to ignore.
Austin’s Climate Creates Specific Roofing Vulnerabilities
Furthermore, the local climate places particular demands on residential roofing that homeowners in milder regions simply do not face to the same degree. Intense summer heat accelerates shingle deterioration, causes adhesive strips to soften, and expands roofing materials through repeated thermal cycling that gradually weakens seals and fasteners over time. Severe thunderstorms bring hail and high winds capable of dislodging shingles, damaging ridge caps, and forcing water into previously secure seams. A professional inspection accounts for these region-specific stressors and evaluates the roof against the actual conditions it faces rather than generic standards.
Catching Small Problems Early Saves Significant Money
Another compelling reason to schedule regular professional inspections is the straightforward financial logic of early intervention. A cracked pipe boot seal or a small section of lifted flashing addressed during a routine inspection costs a fraction of what the same issue costs once it has allowed water to penetrate the decking, saturate insulation, and begin damaging interior ceilings and walls. Roof repairs exist on a spectrum from inexpensive maintenance to full replacement, and where a homeowner lands on that spectrum is largely determined by how early developing problems are identified and addressed.
Inspections Provide Critical Documentation for Insurance and Sales
Finally, a professional roof inspection produces documented findings that serve homeowners in situations well beyond routine maintenance. Insurance claims following storm damage are significantly easier to process when a pre-existing inspection report establishes a clear baseline of the roof’s prior condition. Homeowners preparing to sell benefit from inspection documentation that demonstrates proactive maintenance and removes roof condition as a point of negotiation during the transaction.
Conclusion: See What Your Roof Is Really Telling You
To wrap it all up, a professional roof inspection is one of the most straightforward and cost-effective steps a homeowner can take to protect their single largest investment. It reveals what ground-level observation cannot, accounts for the specific demands of the local climate, enables early and affordable repairs, and produces documentation that pays dividends during insurance claims and property transactions.

Recent Comments